> ## Documentation Index
> Fetch the complete documentation index at: https://dripart-docs-robin-i18n-sync.mintlify.site/llms.txt
> Use this file to discover all available pages before exploring further.
# Luma 图像到图像合作节点 ComfyUI 官方示例
> 本指南介绍如何在 ComfyUI 中使用 Luma 图像到图像合作节点
Luma 图像到图像节点允许你借助 Luma AI 技术,根据文本提示修改现有图像,同时保留原始图像的某些特征和结构。
## Luma 图像到图像擅长什么
* **提示词驱动的图像编辑**:根据文本提示修改现有图像,同时保留原始图像的某些特征和结构
* **改变物体和形状**:该节点在改变物体和形状方面效果很好,但可能不是改变颜色的理想选择
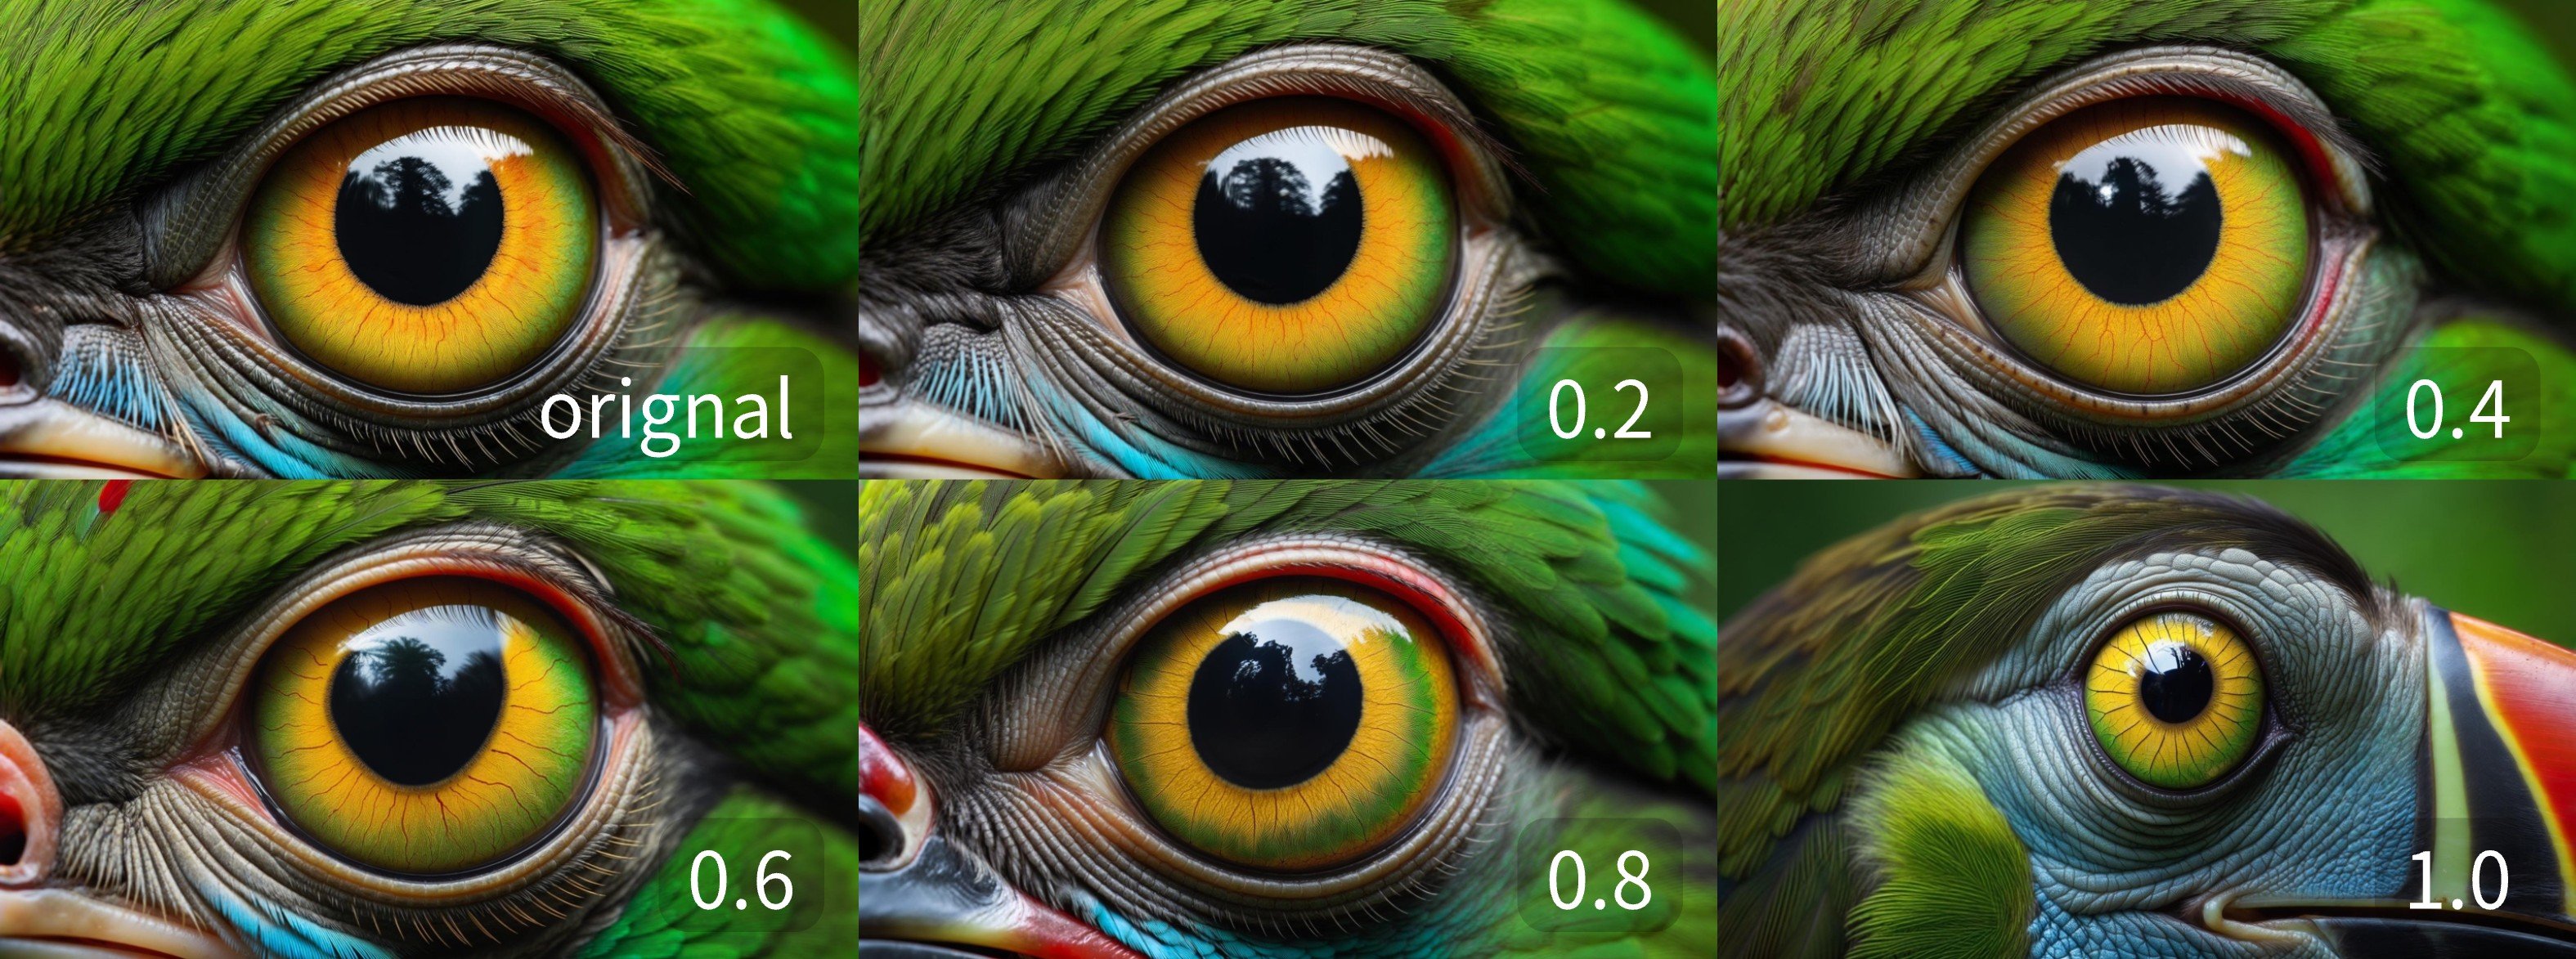
* **可调节的输入影响**:`image_weight` 参数控制输入图像对结果的塑造程度,值越低越接近原始图像
## 示例输出
不同 `image_weight` 值的结果,展示了输入图像对生成输出的影响程度:
 ## 在 ComfyUI 中使用
在 ComfyUI 中运行图生图工作流,可在本地或 Comfy Cloud 上运行
## 在 ComfyUI 中使用
在 ComfyUI 中运行图生图工作流,可在本地或 Comfy Cloud 上运行